After reading the first and the second articles in the “Algo trading with MQL5” course, you already know the origins of algorithmic trading and the main types of trading robots. We also showed you where to find these automated trading programs in MetaTrader 5. This is not a secret that good programming skills will certainly help you with building a robot. But is it that necessary to be a programmer to construct an expert advisor? No, it isn’t! MetaTrader 5 allows creating simple ready-made trading robots using MQL5 Wizard. Let's learn how to do it!

What is MQL5 Wizard?
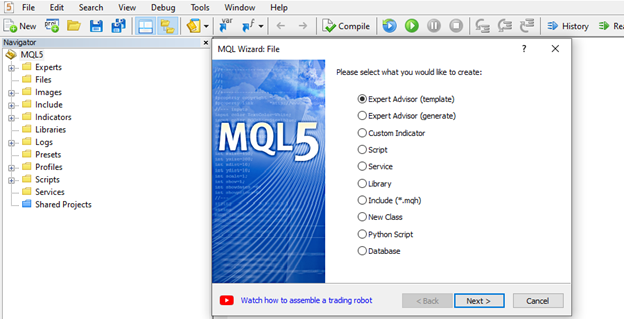
MQL5 Wizard is a tool that helps to create robots and program templates based on the settings you choose. It generates expert advisors that can provide reliable signals. All you need to do is to select the desired parameters as a base for an expert advisor's construction. To get access to it, you need to open MetaEditor - trading strategy development environment integrated with MetaTrader 5 platform. You can find its button right above the timeframes menu.

After opening MetaEditor, you need to click “New” in the upper left corner of the program. This button will launch MQL5 Wizard.
How to create an expert advisor in MQL5 Wizard?
You can easily develop a new expert advisor by following the instructions given by the MQL5 Wizard. Let’s look at each step in detail.
Firstly, you need to define a strategy you want to program in your trading robot.
MQL5 Wizard’s library contains a set of signals. They are basically the standard alerts that indicators provide. When you create an expert advisor, you can use any combination of the modules of trade signals (up to 64). You can find the description of them in the MQL5 documentation.
In our example, we will use the following inputs:
Instrument: EUR/USD
Timeframe: H4
Indicators: Simple moving averages with the 21 and the 89 periods, MACD (12; 24; 9).
Now, let's build this expert advisor.
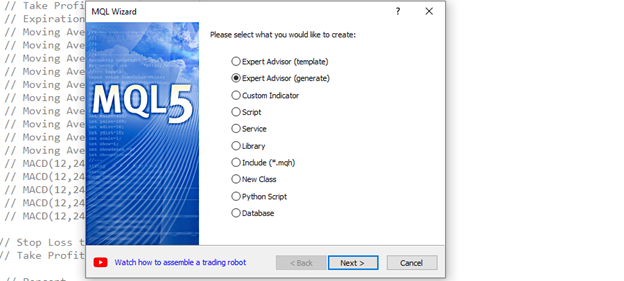
In MQL Wizard, click "Expert Advisor (generate)".
In the next step, you need to name your expert advisor. Here, you can also choose a specific asset this EA will work with and a timeframe. As we want to trade EUR/USD on the H4 timeframe, we write EURUSD in the “symbol” string and “H4” in the timeframe.
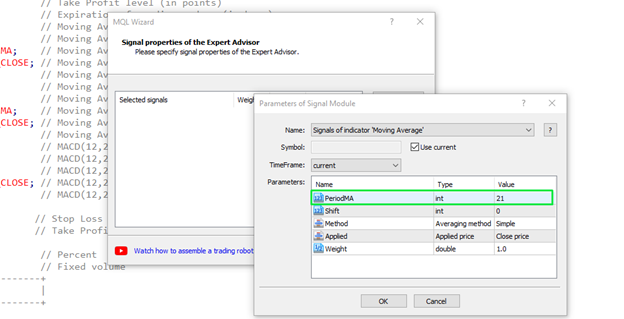
Choosing the right signals for your expert advisor.
This step represents the most interesting part of a process. Here, we declare the settings under which a trading robot is going to operate. After clicking “Add”, we select the pre-determined signals. Each set of signals has its parameters. For example, to add the signals of 21-period moving average to our EA, we need to set its period (21), its shift from the current bar (0), the averaging method (Simple), the price to apply the MA (Close price), and the weight of the signal (1.0).
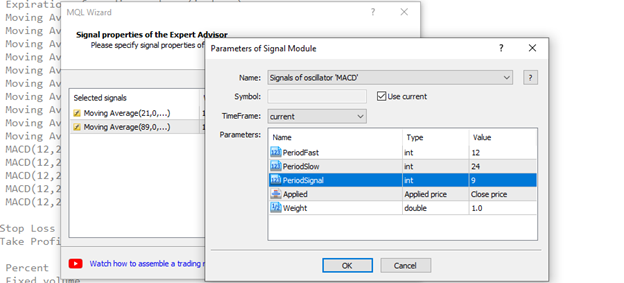
As for MACD, we leave it with standard settings (fast period = 12, slow period = 24, and period signal = 9).
For a detailed description of each signal, visit the MQL5 website.
You can also specify a timeframe for a particular signal. For example, if you want to see a confirmation on a larger timeframe, you need to fill in the "Timeframe" setting.
Applying a trailing stop
After adding all parameters, our Expert Advisor is almost ready. Our next action will be setting the trailing properties of our EA. In other words, we need to decide whether we are going to use a trailing stop loss or not. There are four options you can choose from:
- avoid using stop loss (trailing stop not used);
- place it based on fixed Stop Level;
- set it based on a particular MA;
- use Parabolic SAR.
In our example, we don’t use a trailing stop loss.
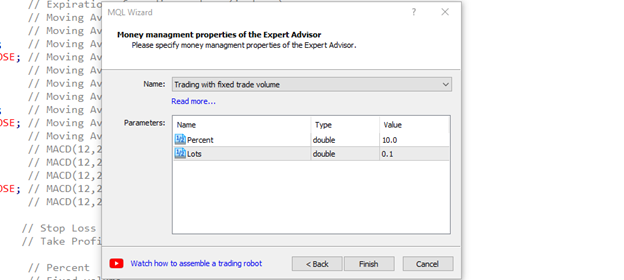
Rules of money management
In the final step, you can declare the rules of money management for your expert advisor. We choose to trade with a fixed trade volume of 0.1 lots and a risk of 10%.
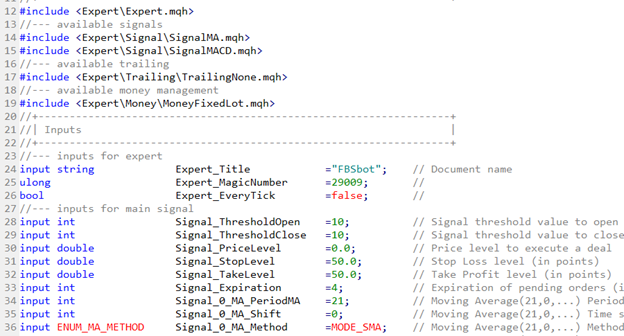
After we click finish, we get a big and structured code in MetaEditor. These are the spine and bones of our expert advisor.
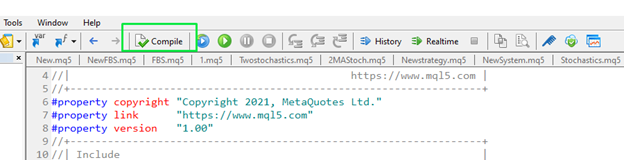
How can we turn it into a robot? You can easily do that by pressing the compile button. This action will create a file for your robot and transfer the code into MT5.
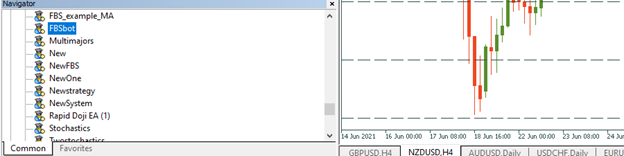
After that, you can find the robot in the “Navigator” window of MT5.
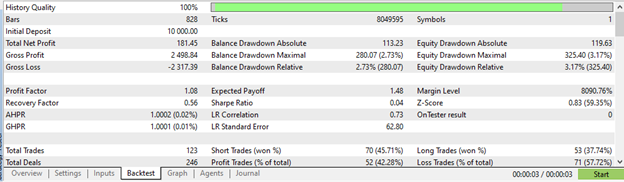
You can backtest your trading robot by clicking "Test" on the name of the robot. After the strategy tester opens, choose the suitable parameters and then press "Start". You can get the results of this check-up in the backtest bar.
Now, you can build a fully functional trading robot without any programming skills and experience. However, if you want your expert advisor to execute more complicated commands, you still need to learn how to program them right. In the next articles in this course, you will learn the basics of coding your first robot in MQL5!